
- Image Enhancer Tool
- Sketch & Art ▼
- Image Editing ▼
- Apply Effects ▼
- Image Filters ▼
- Advance Filters ▼
- FAQ
- Useful Info ▼
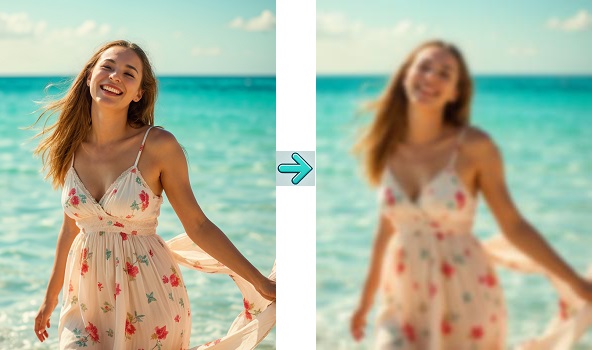
Do you want to blur your images completely? With our free blur image online tool feature, you can easily apply blur effects to your complete image. Apply blur only with few clicks, no complexity and no cost involved. Add blurry effects to your photos to make them softer, more aesthetically pleasing and to hide certain details.
With "Adjustable Blur Intensity", control the strength of the blur effect you want to achieve. And, with multiple image formats support, you can easily edit and blur any photo without compatibility issues.
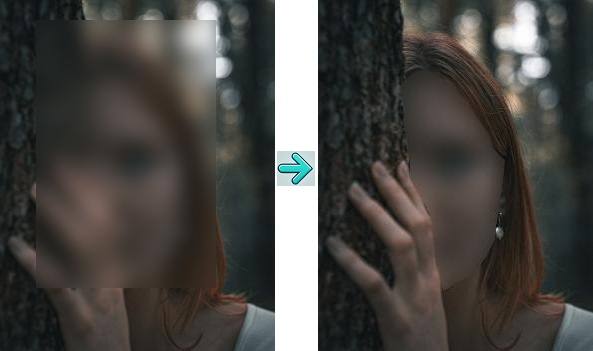
If you only want to add blurring within your image certain parts or blur specific area and not the complete image! This is the best image blur feature of this tool, which you can apply with ease and flexible options. Now, you can select only a specific part of your image and selectively blur areas. Whether you want to blur faces, backgrounds, hide any secure or private information, want to highlight subject or want to give amazing blurring effects to your photos. With this Selective Blur feature and real-time preview, you get complete control on how you want to apply blur within your image.
As you can see in the left side image, you can blur specific areas using selection tools: Rectangular and Polygonal. Apply the blur precisely on any region you want to hide, censor, or soften without affecting the entire image.
With this feature, you can:
Image blurring is a process of softening or distorting either complete image or specfic parts of an image. This makes images either completely or partially less clear. The purpose may be to add surreal effects or want to highlight some areas in image so that the subject should pop or to convey some important message or to hide certain details in the image for the security and privacy.
Image blurring creates blurred images which gives impression of a dream like and artistic effect. Image blur functionality is useful in many scenarios, such as: If you want to blur the background of an image or a picture so that the subject of image pops up, if you want to hide some personal or sensitive information while sharing your photos online on social media platforms or you want to create some serenne effects in your captured photos. Blurry images are used for many purposes.
Our free image blur tool and photo editing tool, "PHIEN Image" gives you complete flexibility in easily applying blur effects to either complete images or blur any specific or selected part of an image. With only few clicks, you can apply the required intensity of blur in your images.
To apply blurring to your complete image with image filter "Blur Complete Image", follow these steps:
To apply blurring to selected or any specific part of your image such as faces (face blur), background, particular place, any text or any other item with the image filter "Blur Specific Part of Image", follow these steps:
We have introduced a smarter way to handle large images for a smoother editing experience:
This functionality gives you freedom of selecting and blurring any specific part in your image. Whether it is image background, human faces, any text or other item. You can select that particular area and apply blur effect there.
But, if you want to blur the complete image background or remove the image background. That feature is available on this page: Remove Background and Blur Background. You just have to go on this page, select "Blur Background" feature and apply blurring to the complete image background with the required Background Blur Intensity and Background Opacity (Background Transparency). Only in seconds with simple mouse clicks.